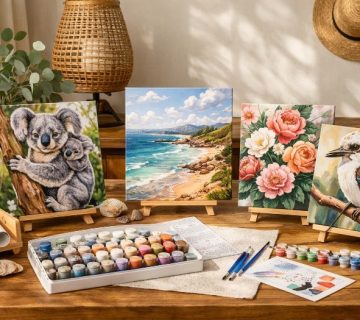
How To Create a Paint by Number
Creating a Paint By Number artwork can be a rewarding and relaxing activity, allowing you to express your creativity without the pressure of starting from scratch. Whether you’re a beginner or an experienced artist, this step-by-step guide will help you create your very own paint by number masterpiece.
What You’ll Need:
- Paint by Number Kit: These kits usually include a pre-printed canvas, numbered paint pots, and paintbrushes.
- Additional Brushes: Having a variety of brush sizes can help with different areas of your painting.
- Palette or Plate: For mixing colors, if necessary.
- Cup of Water: To rinse your brushes.
- Paper Towels or Rags: For drying brushes and cleaning up spills.
- Pencil: For any adjustments or notes you might want to make.
- Varnish (Optional): To seal and protect your finished artwork.
Step-by-Step Guide:
- Choose Your Design:
- Begin by selecting a Paint By Number kit that appeals to you. Kits come in various themes, including landscapes, animals, and abstract designs. Pick one that inspires you!
- Set Up Your Workspace:
- Find a clean, well-lit area where you can work comfortably. Lay out your canvas, paints, brushes, and other supplies. Ensure you have enough space to manoeuvre freely while you paint.
- Understand the Color Codes:
- Before diving in, familiarize yourself with the color key that accompanies your kit. Each numbered section on the canvas corresponds to a specific paint color.
- Start Painting:
- Begin with the largest sections first, using a brush that matches the size of the area you’re working on. This approach allows you to fill in larger spaces more quickly.
- Dip your brush in the corresponding paint, then carefully fill in the numbered section. Take your time to stay within the lines, and don’t worry if you make mistakes—this is all part of the process!
- Work Methodically:
- Move from one numbered area to the next, working systematically. You can follow the order of the numbers or jump around if you prefer. Just ensure each section is completed before moving on to the next color.
- Layering:
- If you notice that the colors are not as vibrant as you’d like, allow the first coat to dry and then apply a second coat. This can help enhance the overall appearance of your artwork.
- Clean Your Brushes:
- Make sure to rinse your brushes in water between color changes to prevent mixing paints. This will keep your colors true and your painting looking clean.
- Finishing Touches:
- Once you’ve completed all the numbered sections, step back and examine your work. You can add any final touches or corrections using a fine brush for detail work.
- Let It Dry:
- Allow your painting to dry completely. This may take a few hours depending on the thickness of the paint layers.
- Varnish (Optional):
- If desired, apply a layer of varnish to protect your artwork and enhance its shine. This step is especially useful if you plan to display your painting.
- Display Your Masterpiece:
- Once your painting is dry, find the perfect spot to showcase your artwork. Frame it or hang it as is, and enjoy the satisfaction of having created your very own paint by number piece!
Creating a Paint By Number artwork is not only a fun and engaging activity but also a fantastic way to unwind and tap into your creative side. At Paint for Life, we believe that everyone can enjoy the art of painting, regardless of their skill level. So, gather your materials, follow these simple steps, and let your creativity flow. Happy painting!


No comment